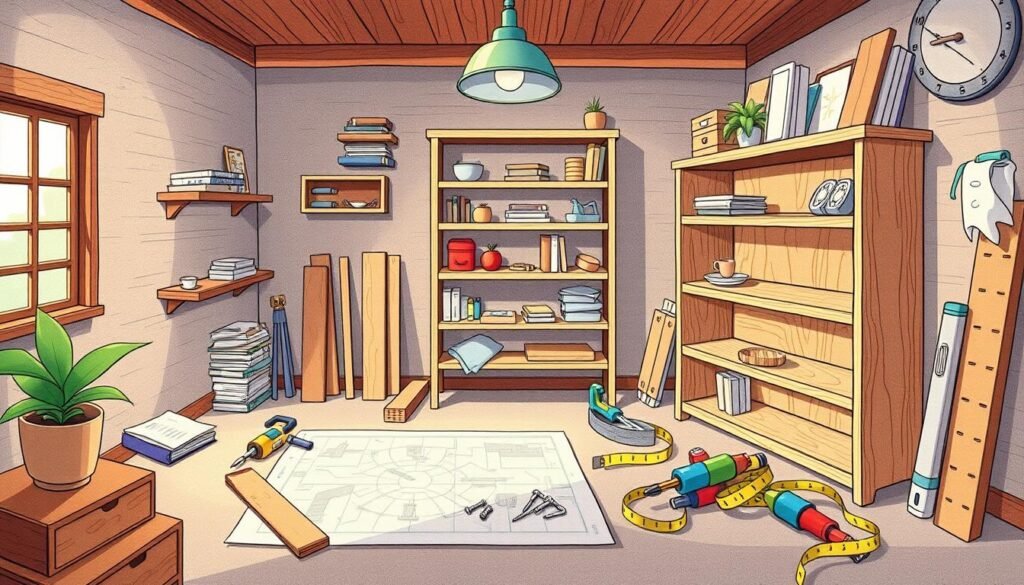
Have you thought about making your own shelving units? Many people choose pre-made ones. But, making your own can make your home look better and work better.
Building your own shelves can make your home look great and help you stay organised. This DIY project is fun and rewarding. It doesn’t matter if you’re new to DIY or have some experience. This guide will help you do it well.
Introduction to DIY Shelving Units
Building your own shelving units is rewarding and useful. It lets you make your space special. You can arrange things just how you like them.
When I made my own shelves, I learned a lot. Using strong 2×4″ boards and 1/2″ plywood makes shelves that hold a lot. The right materials make a big difference.
Building shelves is very motivating. It starts to feel easy once you know the basics. Every step helps you learn more about making something useful and nice. DIY shelving lets you be creative and keep things tidy.
Understanding the Benefits of Custom Shelving
Custom shelving makes my home better and more welcoming. It’s great for small rooms because it uses space well. This makes rooms look bigger.
It’s also good for closets. It helps me keep clothes and things tidy. This makes my closet look neat and organised.
Custom shelves let me show off my style. I can pick designs, colours, and textures that match me. This makes my home look unique.
It also fits with my home’s look. I can choose styles that match my taste. This means I can pick from many designs.
Custom shelving is not just about looks. It also keeps things safe. I can plan it to fit my needs perfectly. This makes it easy to reach what I need.
It’s also easy to change later. I can add new features like USB ports. This makes my shelves useful for today and tomorrow.
| Benefits | Details |
|---|---|
| Enhances Space | Optimises small rooms to create an impression of more space. |
| Maximises Closet Storage | Efficiently organises clothing and accessories, improving practicality. |
| Reflects Personal Style | Showcases individual aesthetics through custom designs and colours. |
| Complements Interior Design | Integrates seamlessly with existing decor and enhances visual appeal. |
| Provides Functional Security | Safeguards valuables while maintaining beautiful storage solutions. |
| Offers Adaptability | Allows modifications for future needs, ensuring long-term usability. |
Choosing Materials for Your Shelving Project
Choosing the right materials is key for shelves that look good and work well. Knowing about different types of wood can really help. It makes shelves not just useful but also nice to look at.
Types of Wood for Shelves
There are many types of wood for shelves:
- SoftwoodA popular choice for DIY projects, softwoods like pine are easy to work with and cost-effective. They do, however, tend to be less durable than hardwoods.
- Hardwood: Woods such as oak and maple are very strong. They look great, making them perfect for shelves you can see.
- Plywood: Plywood comes in different grades. It’s stable and can be made stronger by layering it.
- Particle Board: This is made from wood chips. It’s cheap but not as strong, best for hidden shelves.
- MDF (Medium Density Fibreboard): MDF is smooth and great for painting. It looks good on shelves.
Durability and Aesthetics
When picking materials, think about how long they’ll last. Hardwood shelves last longer than soft ones. Plywood and MDF look good when finished well, meeting your style needs.
For materials, go to local timber shops or home stores. They have lots of choices. Picking the right wood makes your shelves look amazing and last longer.
Tools You Will Need for Construction
Building your own shelves needs the right tools. The right tools for building shelves make the job easier. Here’s a list of power tools and hand tools you’ll need.
Essential Power Tools
Power tools help you build shelves faster. Here are some essential power tools for DIY shelving projects:
- Combi Drill: Great for drilling holes and driving screws.
- Circular Saw: Best for cutting wood to the right size.
- Brad Nailer: Makes attaching wood parts quick.
Hand Tools for Precision Work
Hand tools are key for precision. They help with fitting and alignment. Here are some important tools:
- Spirit Level: Keeps your shelves balanced.
- Tape Measure: Takes accurate measurements.
- Pencil: Marks measurements on wood.
- Hand Saw: Good for precise cuts in tight spots.
Having these tools for building shelves makes the job easier. Quality tools improve your shelving units.
Planning Your Shelving Unit Design
Planning is key when starting a shelving unit project. I start by measuring and sketching my design. This ensures the unit fits perfectly and looks great.
Measuring Your Space
Measuring the space is very important. I use a tape measure to get the exact dimensions. Here are some tips:
- Measure the height, width, and depth of the space to ensure optimal fit.
- Consider any obstacles like windows, doors, or furniture that could affect the shelving’s placement.
- Account for the height of the shelves based on what items I plan to store or display.
Using an online shelf configurator helps a lot. It lets me see my design in 3D and make changes easily.
Sketching Your Design
After measuring, I sketch my design on graph paper. This helps me see how everything will fit. I focus on:
- Outlining the dimensions and layout of each shelf.
- Considering the types of shelving systems from various brands, such as CLOS-IT and BOON, which offer unique features.
- Experimenting with configurations to maximise space efficiency.
This way, I can make the shelving unit just right for me. With careful planning, I’m ready to start building.
Build Your Own Shelving Units: Step-by-Step Construction Process
Starting to build shelving units is exciting. It needs careful planning and doing. First, get your area ready for building. A clean space helps you stay safe and organised.
Preparing the Area for Assembly
Make sure your area is clean and bright before you start. This stops accidents and makes building easier. Here’s what to do:
- Clear the space of any unnecessary items.
- Gather all materials such as beams, vertical supports, and plywood sheets.
- Have tools like the drill, tape measure, and pencil handy.
- Put on safety gear, including eye protection and a face mask.
Cutting Materials to Size
Being accurate when cutting is key. Measure each piece carefully. You’ll need six 2x4x12′ beams, six 2x4x7″ vertical supports, and more.
Use the right tools for cutting:
- Power saw for straight cuts.
- Measuring tape for precise measurements.
- Pencil to mark cutting lines clearly.
After cutting, sort your pieces. This makes building faster and less confusing. Make sure your shelves are the right size for your space.

Spending time on these steps makes building shelving fun and productive. After two and a half hours of prep, you’re ready to start building!
Assembling the Shelving Unit Frame
Starting to build shelving units is exciting. First, we make a strong base and supports. This is key for the unit’s stability and lasting power.
Building the frame needs focus and knowing the materials well.
Constructing the Base and Supports
I make sure the bottom shelf is 15-1/2 inches off the floor. Using pine wood makes the unit look good and strong. Dowels help join parts together easily.
Before gluing, I check all parts fit well. This shows the unit will be solid.
Tools needed for this part are:
- Tape measure
- Spirit level
- Power drill
- Screwdriver
- Pencil
- Pilot drill bit
- Masonry drill bit
- Rawl plugs and screws for fixing to the wall (not included in the package)
Attaching the Back Panels for Stability
Adding back panels makes the unit stable. They stop it from wobbling. I colour the wood with dye and varnish it for a nice finish.
While building, safety is important. I don’t overload the shelves and use the right wall fixings. I measure and drill holes for fixings, and install the Wall Track and uprights.
| Aspect | Details |
|---|---|
| Height of Unit | 40 inches |
| Number of Shelves | 3 shelves + top |
| Material Used | Pine wood |
| Surface Pre-finishing | 320 grit sanding |
| Assembly Video Duration | 2 minutes and 51 seconds |
| Joinery Method | Dowel joinery |
Now, my shelving unit is ready. It’s strong and looks great. Building it was fun and rewarding.
Finishing Touches: Painting and Staining
Adding the final touches to shelving units makes them look great. The right finish is key. It looks good and keeps the wood safe from damage.
I like using DecoArt Americana Satin Enamel paint. It’s easy to use and doesn’t need primer or sanding.
Choosing the Right Finish
There are many things to think about when painting or staining shelves. Here are a few:
- Durability: Choose finishes that can handle daily use, especially if the shelves will hold heavy things.
- Colour: You can mix paints to create your own colours. I mix black, white, and beige to get a special shade.
- Type of Finish: Satin finishes are nice because they have a bit of shine but not too much.
Applying Paint or Stain for a Professional Look
For a top-notch finish, use a soft brush and good rollers. Here’s how to paint wood:
- First, apply a smooth primer. I like Bulls Eye 1-2-3 primer for a strong base.
- Then, put on two coats of satin enamel paint. Let each coat dry fully before adding more.
- Think about using a sealer to keep the paint safe, especially in busy places.

Be patient. Let the paint dry for a few days for the best results. This way, you can change colours later without a lot of work. The right finish can make shelves look amazing, showing off your style and creativity.
| Finish Type | Durability | Recommended Application Method |
|---|---|---|
| Satin Enamel | High | Soft tip brush & rollers |
| Matte Finish | Medium | Sponge applicator |
| Gloss Finish | Very High | Foam roller |
Styling and Organising Your New Shelving Unit
After building your shelving unit, it’s time to style and organise it. How you arrange your items shows your personality and style. It also makes your space look better and use space well. Let’s look at some ideas for smart storage and display.
Smart Storage Solutions
It’s important to make your display look good and be useful. Smart storage keeps your space tidy and looks nice. Here are some tips:
- Use baskets or boxes: They keep small items tidy and look neat.
- Incorporate vertical space: Use shelves or hang things to make the room look bigger.
- Mix open and closed storage: Use shelves with doors or drawers and open ones too. This balances seeing things and keeping them organised.
- Utilise drawer dividers: For small items or office things, dividers help keep them in order in drawers.
Display Ideas for Your Shelves
Organising is key, but how you display things matters too. Here are some ideas to make your shelves stand out:
- Group by theme or colour: Organise books, decor, and personal items in a way that looks good.
- Layer items: Put big things at the back and small ones in front. This adds depth.
- Incorporate greenery: Adding plants or flowers brings life and colour to your display.
- Highlight personal treasures: Show off special souvenirs or framed art to share your story.
Styling your shelves is about making a space that shows your taste and is useful. Try different ways until you find what works best for you. Happy styling!
Conclusion
As we finish our journey into DIY shelving, I’m thrilled about the changes you can make. Making your own shelves is cheaper than buying them. It also lets you be creative and make them your own.
Building custom shelves might take 4 to 6 hours. But the look and feel you get is worth it. You can make shelves that hold a lot of weight, lasting longer than store-bought ones.
Doing this project is more than just building shelves. It’s about making your space look good and work well. So, get your tools ready, pick your materials, and start making your shelves. You’ll see how tidy your space can get when you do it yourself.
FAQ
What are the benefits of building my own shelving units?
What materials should I use for my shelving project?
What tools do I need to build my own shelves?
How can I effectively plan my shelving unit design?
What is the step-by-step process for building shelving units?
How do I finish my shelves?
What are some styling ideas for my new shelving unit?
Source Links
- DIY Built in Shelving
- How To Build a Custom Built-In Shelving Unit
- How to Build Shelves (with Pictures) – wikiHow
- How To Build DIY Garage Shelving | Young House Love
- How to make your own custom shelving units –
- Benefits of Custom Shelving – Spencer Carlson Furniture & Design
- Custom Shelving: Tailoring Organization for Every Space
- How to Build Built-in Shelving Units
- Shelving systems and shelving materials for retail | Vision Shopfitters
- DIY Shed Shelving – SO EASY!
- DIY Storage: Easy Extra Space Storage Shelves – Making Things is Awesome
- Shelf Configurator – Create Your Shelving Now | REGALRAUM
- How to design your own custom storage with Atomia | Home & Furnishing | B&Q
- Build Easy Free Standing Shelving Unit for Basement or Garage
- allisa jacobs – How to Make DIY Wood Shelves
- How to Build a Storage Cabinet in 7 Steps — SIMPLY HANDMADE STUDIOS
- How To Build A Shelving Unit or Book Case
- Flexx Shelving Assembly Guide
- Pro Tips: Building DIY Shelves Like an Expert Carpenter
- Tranform Bookcases to Cubbies!!!
- How to refinish Ikea Kallax shelving units — Hausmatter
- Shelving Style Up | How to DIY your shelving – Aimsy’s Antics
- Practical and organised: the DIY wooden shelving unit for your child’s bedroom | Bosch DIY
- How to Build Shelves With Bins: A Complete Step-by-Step Guide
- How To Build a Bookshelf: A Step-by-Step Guide
- Ultimate Guide: How to Build Garage Storage Shelves and Organize Your Space – HDR Garage – Garage Storage DFW


Leave a Reply